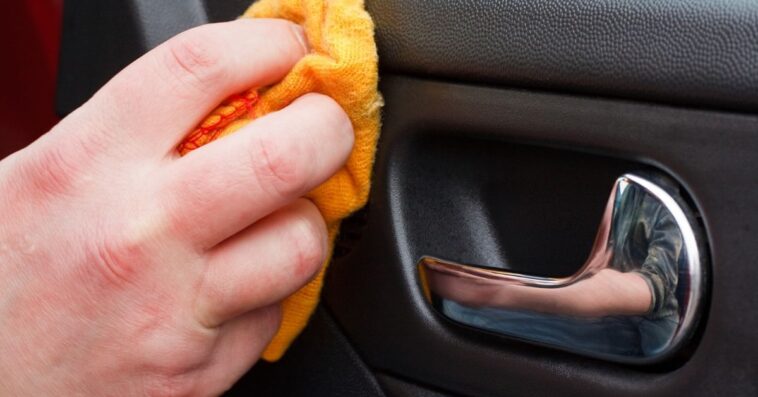
Whether it is a new car or an old one, everyone tries to keep the interior as clean and as close to brand new as possible. Unfortunately, with wear and tear, scratches do appear, especially on plastic surfaces. They are prone to easy damage.
Many of you may be wondering how to remove scratches from the plastic car interior. Ranging from interior cleaners to toothpaste hacks, there are many options thrown around. Let’s check and see which ones work.
Owners of cars, especially new ones, would do anything to make the interior shine. Whether it be the wrong cloth or the toy of your kid, after reading this article, you will never have to worry about light scratches in the interior of your vehicle ever again.
TABLE OF CONTENTS
Different Types Of Damages
The plastic of a vehicle can be scratched by various means. Different types of objects can cause different scratches.
The common types of scratches are:
- Scuffs
- Line Scratches
- Chips
- Cracks
Almost everyone dismisses these different variations as scratches. Some of you may be wondering why it matters. Well, each type of scratch needs to be dealt with in its manner. Before you ask, the methods of fixing them are not interchangeable.
Let’s discuss how these scratches can occur:
1. Scuffs
Perhaps the easiest to remove and fix is called scuffs. Scuffs are the transferred color of whatever rubs against the plastic. As they are not easily wipeable using a wet cloth, people let them be and accept that the damage is irreversible.
If you still want physical evidence of scuffs in your vehicle, the best place is the plastic panels between the door and the car seat. They happen when the shoes drag against the plastic. Just to clarify, scuffs do not damage the surface of the plastic.
2. Line Scratches
Line scratches are also called tears. There might be more than one scratch at the point where the object made contact with the vehicle’s plastic unless the object was pointy and sharp.
The most common reasons for scratches in the car interior are sharp knives or screwdrivers. The chances are that the latter was the reason for it. A line scratch is something that can vary from a light to a deep one. It can be fixed, but the problem is not 100% reversible.
3. Chips
Out of all three, the rarest ones to occur are chips. Again, they are fairly common, but the chances of the plastic getting a chip are much lower than either of the two options I mentioned above.
For those who don’t know, chips are pieces of plastic separated away from the main piece. The problem is more common in plastics that are old and worn.
If you observe that the vehicle’s plastic has started chipping, the most efficient way to reverse the issue is by preserving the plastic pieces. I know the job looks tiresome, but it is better than getting a complete replacement of the plastic part.
4. Cracks
The final and the most painful damage that the plastic of a vehicle can go through is a crack. A crack has two possible reasons to occur.
It can either be too much force on it or due to extreme aging. Cracks are commonly seen in vehicles that have not been cared for properly; in other words, they have been neglected.
People normally think that cracks in a plastic surface don’t have any solution other than a replacement. Well, I beg to differ. You will definitely be surprised by the options I will be presenting below.
Ways To Get Scratches Out Of The Car Interior
Let’s finally get down to the question you have been waiting for. If you have visited the internet in regards to this topic, then you may be aware of the hundreds, if not thousands, of tutorials that claim to wipe any interior plastic surface clean.
I can guarantee you that out of all of those; there are only a few that work as intended. Let’s list down the most common ones.
1. Applying A Heat Gun
Now, I know that many of you may be confused and even about to turn back on this article. It is rare to see the name heat gun associated with plastic surfaces. Well, I assure you that you will be surprised with the final result.
A heat gun is only one of the many things you will require for the job. Other items that you will need are:
- Sand paper
- Interior car cleaner
- Microfiber towels
Before you start, make sure that you have more than one towel for easy usage. The first thing that you will do is spray some cleaner onto the towel and clean the designated area. If it is a scuff, then there are chances that you will not need to proceeds further.
Use a circular motion to clean any dust and debris that may be present. Use a second dry towel to completely wipe off any traces of the cleaner and the dust.
When that is done, grab a heat gun and apply it to the scratched area. Make sure not to set the setting too high. That may lead to an irreversible deformity. Then use sandpaper to sand down the area and make sure you have a smooth finish.
Check this out:
2. Plastic Scratch Polish Kits
You may have seen tens of telemarketing advertisements that claim their products remove any and all scratches. Most of us are intelligent enough not to give in to those ludicrous claims.
But don’t let these companies defame other products that actually work. For example, there are plastic scratch polish kits that remove light scratches. This is perfect for those barely visible scratches that may be caused by the vehicle’s key or something else.
These polish kits come with everything you will need for the job.
This includes:
- Microfiber towels
- A polishing compound
- Buffing pads
- Maybe even a rubbing compound
Trust me when I say this is all you need to wipe away those light scratches that destroy the beauty of the interior of the vehicle. There will be instructions included, but let me explain the process.
- Use sandpaper to smoothen out the scratched area.
- Spray the surface with the plastic cleaner and then use a microfiber cloth in a circular motion for proper cleaning.
- Use the buffing pads to polish the sanded area. This will eliminate anything caused by the sandpaper.
- Re-apply the polish to confirm you have not missed out on any area.
- Allow the polish to dry this time. After a few minutes, clean off the excess polish using a new microfiber cloth.
Some kits come with a rubbing compound. If that is included, then you don’t need the sandpaper at all. It does the same job, but more efficiently. Regardless, after the procedure is complete, you can expect there to be no light scratches on the surface of the plastic.
3. Using Filler Putty
Many of you may already be aware of these polish kits out there. They are pretty common. But, now, let’s jump into the big leagues. I will be talking about deep scratches in this section of the article.
This is something that has frustrated hundreds of thousands of vehicle owners. No matter how many precautions a person takes, a scratch does appear somewhere. When you cannot avoid that, the only thing left to do is to find a solution to the problem.
Step 1: Check The Plastic Surface
Before you start, check to see if the plastic surface that you will be working on is removable. If the process is easy enough, then you should definitely remove it. The reason for this is that it will not only be easier to work on, but all sides of the panel will be accessible too.
Step 2: Sand Down The Area
The first thing to do, as many of you may have expected, is to sand down the area until it is smooth. The process may take time as deep scratches are harder to level out. You should also use a razor to cut off any poking plastic bits and pieces.
Step 3: Make A Grain Pad
Now we shall begin with the more complicated part of the procedure. The first thing that you should do is to make a grain pad from the filler putty. Then aim the surface sealant and the protector on the part of the panel you want to fix. This makes sure that the glue will not hold.
Step 4: Take A Small Piece Of Plastic
Here comes the magical part. Now, we shall take a small piece of plastic that is a bit bigger than the scratch we are trying to eliminate. Glue one side of it and then stick on to the scratch. Spray some sealant onto it.
Step 5: Dry The Glue
The glue should dry out rather quickly. You can then pull out the plastic easily. If you did not rush the process, then the glued side should perfectly match the grain pattern of the plastic panel.
Step 6: Filler Putty
Now comes the work for the filler putty we readied in the first step. All you need to do is apply a thin coat of it on the surface. Use a razor to spread it out evenly.
Before the putty dries out, which is rather quickly, take the plastic that you used the glue on and then imprint it on the putty. This will allow you to perfectly capture the pattern of the plastic.
Step 7: Filling The Crack
Now, the final step is the one that you should be more focused on. Anyone can fill in a crack. But the key to making the repair indistinguishable from the real thing is the paint.
You need to perfectly match the paint. You can use slightly different colors, but I think you know that will worsen the look of the interior even further.
This is the best way you can clean and restore the look of the plastic panel that has sustained damage. Whether it be a chip or a deep groove, nothing can beat filler putty in getting the job done for you.
4. Replacement Panel
If your vehicle is fairly popular, then you should not have a hard time finding a new panel. I suggest that you choose this option only when all other options have been exhausted. A new panel is easy to install but will still be prone to the same scratches.
You should take care of it the next time. Regardless, my advice is to try out one of the three options I gave you before. Unless the damage is too much, there is a decent chance of getting the plastic back in new condition.
Household Hacks
Now, I know that some of you may not want to spend money on products that have a chance of not working. You would rather rely on hacks that revolve around using items that are already present in your household.
Although many of these so-called hacks are nothing but clever video editing tricks, there are actually some which work surprisingly well.
1. Using Tooth Paste Or Baking Soda
Let’s talk about the most popular option out of all, using toothpaste to remove minor scratches in the interior of your vehicle. Let’s see the science behind it. Toothpaste and baking soda both are mild abrasives. They are able to clean the plastic in an excellent manner.
You can’t just take toothpaste and apply it to the scratch. You need to follow some steps first. Use an interior spray and clean it up with a dry microfiber towel. The next step is to apply the toothpaste on a different cloth. Remember, the cloth must be damp for this to work.
Now, rub the applied part onto the surface that needs cleaning. Wipe the cloth in a circular motion. A linear motion has been proven to cause more scratches in some conditions.
Just to clarify, this method will work only on scratches that are light and not deep.
2. Using Sand Paper
The next thing that is also found in most households is called sandpaper. Its ability to file down any surface makes it perfect for the job.
If you have read through the article, then you may have seen the use of sandpaper in the solutions above. It is quite effective. Of course, it does have its caveats. Like, sandpaper makes the surface, on which it is rubbed, quite rough.
But, fortunately, there is a solution to this issue. Let’s take the solution step by step so you can know how one person can complete the job.
Take the sandpaper and rub it until the scratch is no longer visible. Next, you have to take a damp cloth to clean all residue.
Now, take sandpaper that has a finer grit. A 1200-grit one will be perfect for the job. Use that and then polish the area. The end result should be perfect and shiny plastic, just like when it was brand new.
Things To Avoid
Many of you may be confused as the choice of materials of each website differs. Well, this section has been written to warn of all the chemicals and liquids that must not be used or even put near the plastic interior of the vehicle.
All of them have been proven to be pretty harmful below:
- The first chemical that you should stay away from is household cleaners. They are the most dangerous things the plastic panels of the vehicle can be exposed to.
The least of all damages they can do is discolor the area where it is applied. You really don’t want to waste your time getting the proper color to paint the affected area. - The next thing is a blow torch. It is highly different from a heat gun. One blows out the fire while the other blows warm air.
I think you get the difference—even a heat gun when on too much of a high setting, can melt the plastic. So, you can imagine the damage that a blowtorch can do. It will be burnt to a crisp, with even half a second of exposure. - You should also steer clear of coarse sandpaper. It will increase that one scratch into dozens of others. Get one that is as fine as possible. Sandpapers with a grit of 1200 have scratches that are easily removable. Rough sandpapers do permanent damage to the interior.
- When you get to the paint part of the process, you may notice that many articles recommend using spray paint. Although it is highly effective, the spray can spread to other unwanted areas. You will have a very hard time cleaning it up.
Conclusion
There really is nothing more painful than seeing the beautiful interior of your vehicle get scratched up.
That leaves many to wonder how to remove scratches from plastic car interior?
I think this article summarizes everything that you can do, and you have to avoid it pretty nicely.
Scratches are something that can happen to anyone. No amount of precaution is enough. Plus, a car is built to be exposed to wear and tear.
If you follow the steps correctly, according to the scratch that is on the plastic of your vehicle, then you should have nothing to worry about.
Just make sure to keep the plastic away from some things that I mentioned at the end. Other than that, you should be good to go.