Today, vehicle tinting has become a growing trend. You would ask the reason as to why it has quickly gained popularity.
Well, the truth is that most vehicle owners do it for fun, not knowing the many benefits that the tint has to offer. I tinted my vehicle windows for privacy reasons.
Some do it to regulate the heat level finding its way into the vehicle. Whatever your reason for the tinting might be, it will help much if you first knew how to perform the tinting.
If you are a driver out there and curious about how to tint car windows, worry less because it’s a simple process that follows simple steps, which include:
- Getting Your Car Ready
- Cleaning The Windows
- Wiping The Windows Dry
- Measuring And Cutting The Film
- Applying The Film
- And The Dry It
If you are a DIY kind of a person, these steps shouldn’t be a bother. You should be able to accomplish the task sooner than possible.
In this article, I will go in-depth to help you accomplish the job like a pro, in an hour or so.
TABLE OF CONTENTS
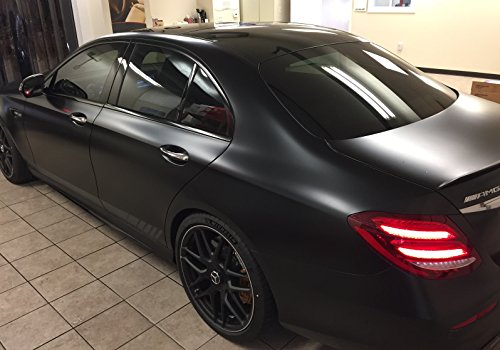
5 Benefits Of Tinting Car Windows
As mentioned earlier, most drivers apply window tinting to keep up with the trend.
Others, me involved, do it for the sake of privacy. One important thing to note is that several other benefits come with adding this unique feature on your vehicle.
They include the following:
- Helps prevent your vehicle’s upholstery from fading, especially if you live in the hot regions.
- Helps block up to 99% of the sun’s UV rays known to accelerate skin aging, as well as cause cancer.
- Can help block anywhere between 35-65% of the solar heat that accumulates in the vehicle.
- It helps protect the vehicle’s windows from shattering, and that’s in case of an accident, or an object hits the window.
- By preventing the stubborn UV rays, and leveling the heat, window tinting helps boost the vehicle’s comfort.
Tips To Put Tint On Your Car Window
I always recommend having a specialist do the mechanical work on your behalf.
However, some tasks, such as window tinting, don’t necessarily need you to consider hiring a pro. If you are a daring individual, you can adhere to the guidelines given above, and you are set to go.
One thing to note is that, like any other activity, tinting also does ask for practice. It’s for this reason that I always advise drivers to start by tinting the tiniest flat window.
By so doing, you not only familiarize yourself with the procedure, but you as well reduce the chances of making a big mistake.
As mentioned earlier, among the first things to consider is driving the car to your garage area.
Why? You may ask. One thing to note is that in the garage, there is enough space for you to do your thing.
Besides, the garage area provides a perfect atmosphere. A temperature of between 40-95°F is helpful when it comes to learning how to tint your car.
The entire tinting process should cost you an hour or so. However, this doesn’t mean that you rush things.
I always insist that you perform the task at your own pace to reduce the chances of making mistakes. You can, however, ask for an extra hand for the job.
By involving other people, you help quicken the entire process. Besides, the people you call upon can help figure out a problem that you couldn’t have seen while working alone.
4 Different Types Of Window Tint Film You Want To Know
By now, you are aware of the primary reasons why you should install tints on your vehicle.
What’s remaining is for you is to head to an auto-shop near your location, and picking the right film for the job.
The market is currently flooded with plenty of options to choose from, and that can see you get confused.
Don’t let the many options confuse, as included below, are some of the different types of window tint that you ought to consider.
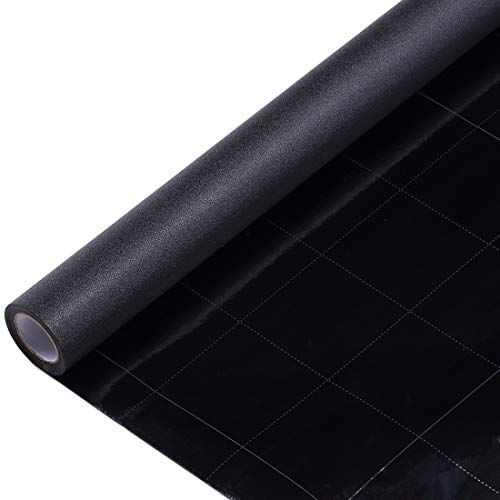
1. Dyed Window Tint Film
If you are a keen observer of what’s happening in the world of automotive, you will realize that the most commonly used tint film is the dyed window tint film.
This kind of film is popular based on the fact that it’s affordable and readily available in many auto shops.
It’s usually black, with a sticky back, and many people assume that it’s black. However, it’s usually clear from the outside, and that’s to allow good visibility and finish.
Pros
- Easy application
- Pocket-friendly
- Decent finish
Cons
- The black dye can fade over time
- Doesn’t offer quality cooling effect an UV protection hence unsuitable for the hot regions
2. Metallized Window Tint Film
Second in the list is the metalized window tint film. As its name suggests, this kind of window film is known for containing microscopic metal particles.
The particles help tint your car’s window while giving it a shiny, metallic finish. With the metallic particles, the film helps provide a reflective coating.
Therefore, it’s a perfect option if you are looking for an alternative to keep the heat out of your vehicle.
Besides, the metallic finishing helps reinforce your windscreen hence reducing the shattering during an accident or when an object hits the window.
Pros
- Strong
- Scratch-resistant
- Good insulator
Cons
- The metallic particles can mess with the phone and radio reception
3. Carbon Window Tint Film
As many people would say, carbon window tint films are an upgrade of metalized window tints.
This is because they contain carbon particles instead of the metallic ones, which are known to mess with the signal reception.
Pros
- Great for blocking the heat from the sun
- Attractive finish
- Good for insulation
Cons
- Quite expensive
4. Ceramic Window Tint Film
Last in the list is the ceramic window tint film. It’s distinguished for having ceramic particles.
Apart from the appealing look, the ceramic particles help offer and excellent finishing against UV rays and heat from the solar.
Pros
- Scratch-resistant
- Has a classy finish
- Resistant to fading
- Perfect for protection against UV and heat
Cons
- Hard to find
- Quite expensive
What Are The 3 Best Window Tint Films?
Finding the best window tint film for your car can be quite a daunting task if you don’t do some background research.
As you probably know, window tint is hard to differentiate from another. Here’s a list of the top 3 window tint films that you can use.
1. VELIMAX STATIC Cling Total Blackout Window Film
First, in this list of best window tint films you can consider is the Velimax Static Cling Total Blackout Window Film.
As its name suggests, this window film helps block almost all the penetration of light, leaving your car darker and colder while offering proper privacy.
Pros
- Blocks almost all the light
- Easy to apply
Cons
- It’s a bit pricey
2. BDF SO5 Privacy Window
Second, in the list is the BDF SO5 Privacy Window. When installed, the film gives your vehicle’s windows a highly reflective look, both on the inside and the outside.
Apart from the mirror-effect and privacy, this kind of window film comes with a strong adhesive hence offers your car windows an extra performance.
Pros
- Offers excellent daytime privacy
- Easy to apply on windows
- Comes with a strong adhesive hence durable
- Perfect where you want to maintain optimum privacy
Cons
- Mirror-effect works during the day only

3. LEXEN Pre-Cut Complete Tint Kit
This particular kit comes loaded with films to fit all the windows, a yellow squeegee, and detailed construction. This makes it useful for the installation, especially for the DIY kind of people.
It’s usually a model-specific kit, and this means that you have got to specify your vehicle’s info while placing an order.
Pros
- Easy to install
Cons
- Expensive
Tinting Car Windows DIY: Step By Step Easy Guide
Getting your car windows tinted might turn out to be a very cool idea. However, very few car owners know how to do it correctly. With the proper guidance you can carry out this task at home.
Here are some important steps that you should follow below:
1. Get Your Car Ready
Before you even park your car in the garage to get started, it’s important to note that you need tools to get the job done.
Some of the items you need for this simple task include:
- A razor blade
- Sponge
- Knife
- Window cleaning solution
- Lint-free cloth
- And of course a window tint film
Once you are sure that every tool is there, it’s time to park your vehicle in a dust-free environment.
The garage area can work best in this case as it is dust-free and offers a perfect work atmosphere.
Besides, I would recommend that you vacuum the car first and remove any stickers from the windows as they may get in the way.
2. Clean The Windows
With your car parked and stickers on its windows cleared, it’s time to do some cleaning. The cleaning here isn’t any special.
It’s the usual cleaning that you are used to performing every morning or once in a while or during the weekends.
Hence, you only need to cover the windows with warm, soapy water. This solution makes it easy to clear off the dirt and dust from the areas.
When cleaning, it’s advisable not to use a cleaner that has ammonia in it. By so doing, you may end up turning your vehicle windows purple after the tinting is done.
It’s for this reason that I always recommend the use of soapy water. Another thing to note is that you must roll down the windows an inch when cleaning. Doing so helps you clean even the top area.
3. Dry The Clean Windows
After cleaning your car windows, your next important step should be to dry them. Here, I would advise you to use a lint-free rag.
If you are lucky to have a squeegee with you, then you can make use of it. However, this may not work, now that you will have to dry the edges of your car windows, as well.
When drying, it’s advisable to work on the space underneath the windows seals also. This helps clear away the dirt that may get in the way while you are adding the window film.
4. Measure And Cut Your Window Film
With your car’s windows clean and wiped to dry, it’s now time to familiarize yourself with the window film before taking the measurements.
Like I always say, a window film is like a giant sticker. Hence, you ought to remove the one side of it to reveal the adhesive underneath.
With the removable side facing you, measure and cut the film against the window.
By spraying some soapy water on the window, your film should temporarily adhere to the window hence allowing you to roll it over with fewer hassles.
Remember to leave at least two to three inches around each edge, but don’t pull it off yet.
With the film stuck on the windows, spray it with more water. Now, proceed to trim the film precisely, one edge at a time.
When working on the top part, make sure to lower the window a bit as this allows you to get the right shape.
5. Apply The Film
By now, you should have the right shape for your windows. It’s advisable to work with one window at a time to help minimize the errors.
One thing to note is that at this exact point, we haven’t peeled off the liner. Therefore, this is the first thing we should do at this time.
With the liner peeled off, you should proceed to spray the sticky side of your window film with the soapy water as you proceed to apply it to your vehicle’s window.
For a practical application, roll down your car’s window a bit, while the film is placed against the inside of the window, on the sticky side.
You don’t want your window tints to have some bubbles inside. To avoid all these, this is where a squeegee comes in handy. Use it to force out the air and water under the film.
Remember, all this is done while rolling up part of the film. By so doing, you ensure that nothing is left in between the film and your vehicle windows.
This is the step that most drivers miss, and as a result, end up with a weird window tint.
6. Dry The Film
Now that your window film is intact, and you have confirmed that nothing is left in between it and the window, you should proceed to dry it up.
Again, here a squeegee works perfectly. You can as well use your lint-free piece of cloth. The idea here is to pick any remains of soapy water.
If you notice any bubbles or air trapped after wiping the film using the fabric, you can consider using a heat gun and heat card to push them to the bottom.
This guy covers the topic in-depth, I recommend you to watch this video:
FAQs
Q1. How Difficult Is It To Tint Car Windows?
Tinting of car windows can be a daunting undertaking for the first-timers, especially. It’s for this reason that I always advise drivers to utilize the help of specialists in the game.
Mechanics can help much during the activity. They can help you pick the right film for your car. But, if you are a DIY kind of a person, you can take on the challenge.
By following the step-by-step guide given, you should accomplish the task within an hour or so!
Q2. Should I Tint The Inside Or Outside Of Car Windows?
When it comes to applying the tint on your vehicle’s windows, it’s important to note that the film is usually applied to the inside part of the windows.
As opposed to a film applied on the outside, the application on the inside is more likely to last longer. This is because it’s expected to be exposed to less harm.
Q3. Is It Worth Tinting My Car Windows?
Tinting of car windows isn’t mandatory. However, it’s much recommended as it comes loaded with plenty of benefits.
First, it helps enhance the vehicle’s appearance. Also, you can’t forget to mention that the tint helps block the excessive heat and UV rays from entering the car.
During an accident, the shade as well helps prevent the window from shuttering. These, among many other benefits, are reasons why tinting your car is worth it.
Q4. Should I Wash My Car Before Tinting Windows?
The tinting of your vehicle windows is a systematic process that asks for preparation. One thing you ought to consider is washing the windows before applying the film.
You don’t have to spend much on window cleaners as soapy water can do the magic.
When it comes to picking a cleanser, it will help much if you avoided one with ammonia. Such cleaners are known to turn your tinted windows purple, once the process is done.
Conclusion
Tinting of vehicle windows has recently become a popular trend. Most drivers prefer doing taking going this road to give their car a sporty look. Others add this enhancement for the sake of privacy.
It doesn’t matter your purpose, tinting your vehicle should be a task you can perform without the help of a specialist.
By reading this piece, you will find a systematic guide on how to perform the act. Also, you will find information about the different kinds of window tints in the market that you can consider.
Sources:
1. AutoInsureSavings.org – https://www.autoinsuresavings.org/tint-windows-5-easy-steps/
2. Holt Lloyd – https://www.holtsauto.com/redex/news/tinting-101-types-of-film-and-how-to-tint-your-car-windows/